In December 2016, my hiking partner Sara and I decided to hike the Annapurna Circuit Trek in Nepal. In the following adventure report, you will find awesome mountain views, cinnamon rolls, a tentative plan for fast hikers, and stupid things one should never attempt (I tried for you).
If you are used to hike 30-50km per day in mountain ranges, this should definitely provide a plan to hike the Annapurna Circuit in 7-9 days. Below that will be difficult if you’re not running and dangerous for your health at high altitude if you don’t acclimate correctly.
While many associate Nepal with the Everest, the country hosts a large variety of breathtaking mountain sceneries. Less popular and more authentic, they offer spectacular hiking routes often well-marked, passing through villages where hikers can rest for the night and enjoy delicious homemade local meals (you can also get pizza or macaroni too, we will get back to that).
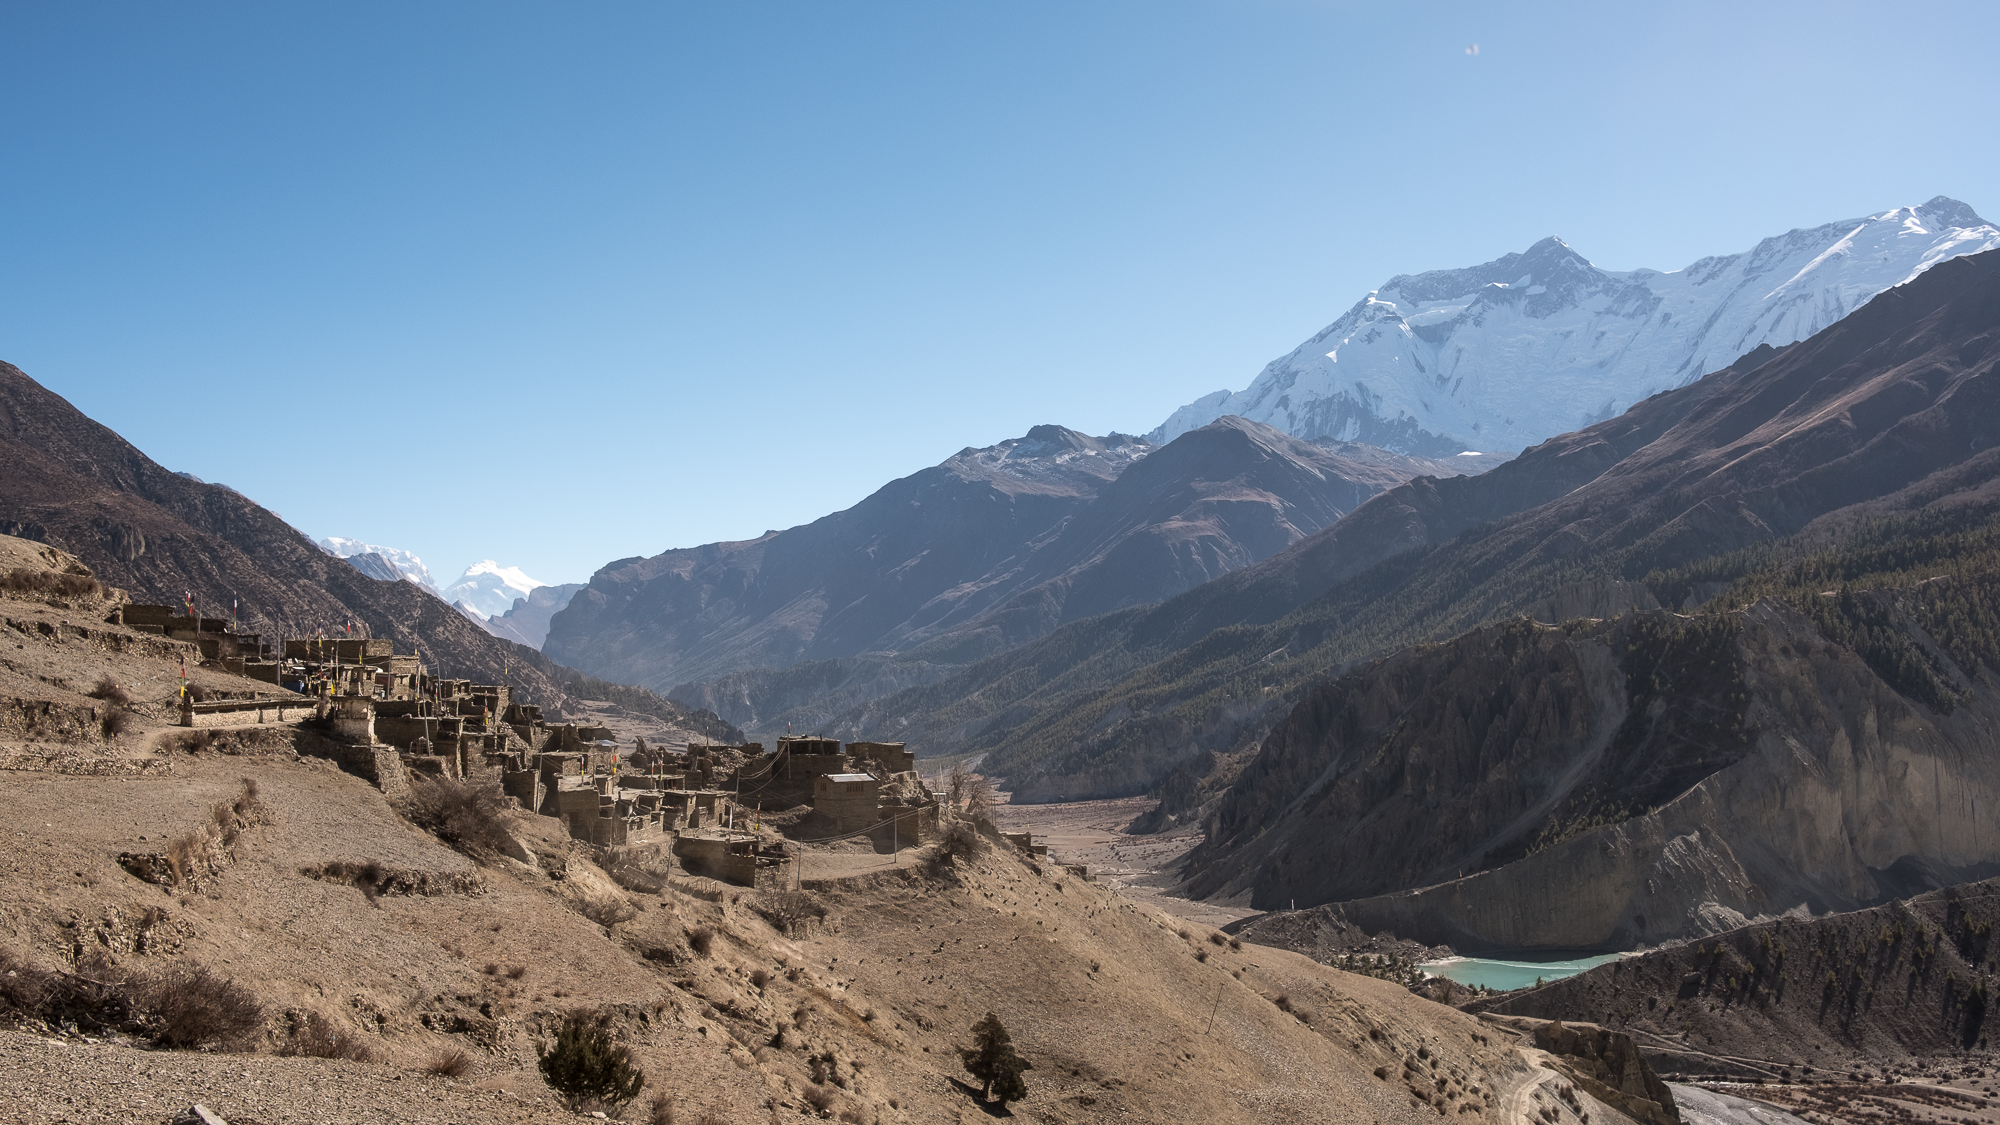
The Annapurna Circuit rides along the edges of the Annapurna massif, from the lower valleys (600m) up to the Thorong La pass (5,416m/17,769 ft, little more after a snow fall). Its 230 kilometers of trails and small roads cross multiple climate zones and cultural areas.
Note: Wikitravel hosts a small comprehensive guide of the Annapurna Circuit, with information on hosting, food, and a detailed itinerary. And for the ACT bible, you should look at this 39 pages guide from 2011, describing everything you could ever wonder to know about the trek.
The Annapurna area was first opened to tourism in 1977 and since that year saw a fast development of urbanism and infrastructure. Except for the higher points, upon where only ponies carry food and equipment, most of the villages can be accessed by jeep and decent Internet Wi-Fi points are now common. However, the trekking routes have been redesigned multiple times, and the last new trails from 2011 avoid most of the roads.
Many groups choose to hike with guides and porters and, while not so frequent, you should not be surprised to see ten German hikers walking with their guide preceded by porters carrying more than three large bags each. However, guides or porters are not required by law here (contrary to restricted areas such as Upper Mustang or Manaslu, where treks must include at least one guide or one porter) and since the trail is very well marked, not necessary. Do not forget, however, than hiring guides or porters helps a lot the local Nepalese economy and benefit them directly. If you are hiking alone, remember that difficulties arise from the altitude (5,400m at the pass, with 50% less oxygen than at sea level) and the weather that can be especially harsh in the winter. In October 2014, 43 people died from unusually severe snowstorms and avalanches, with almost 1.8 meters of snow falling within 12 hours.
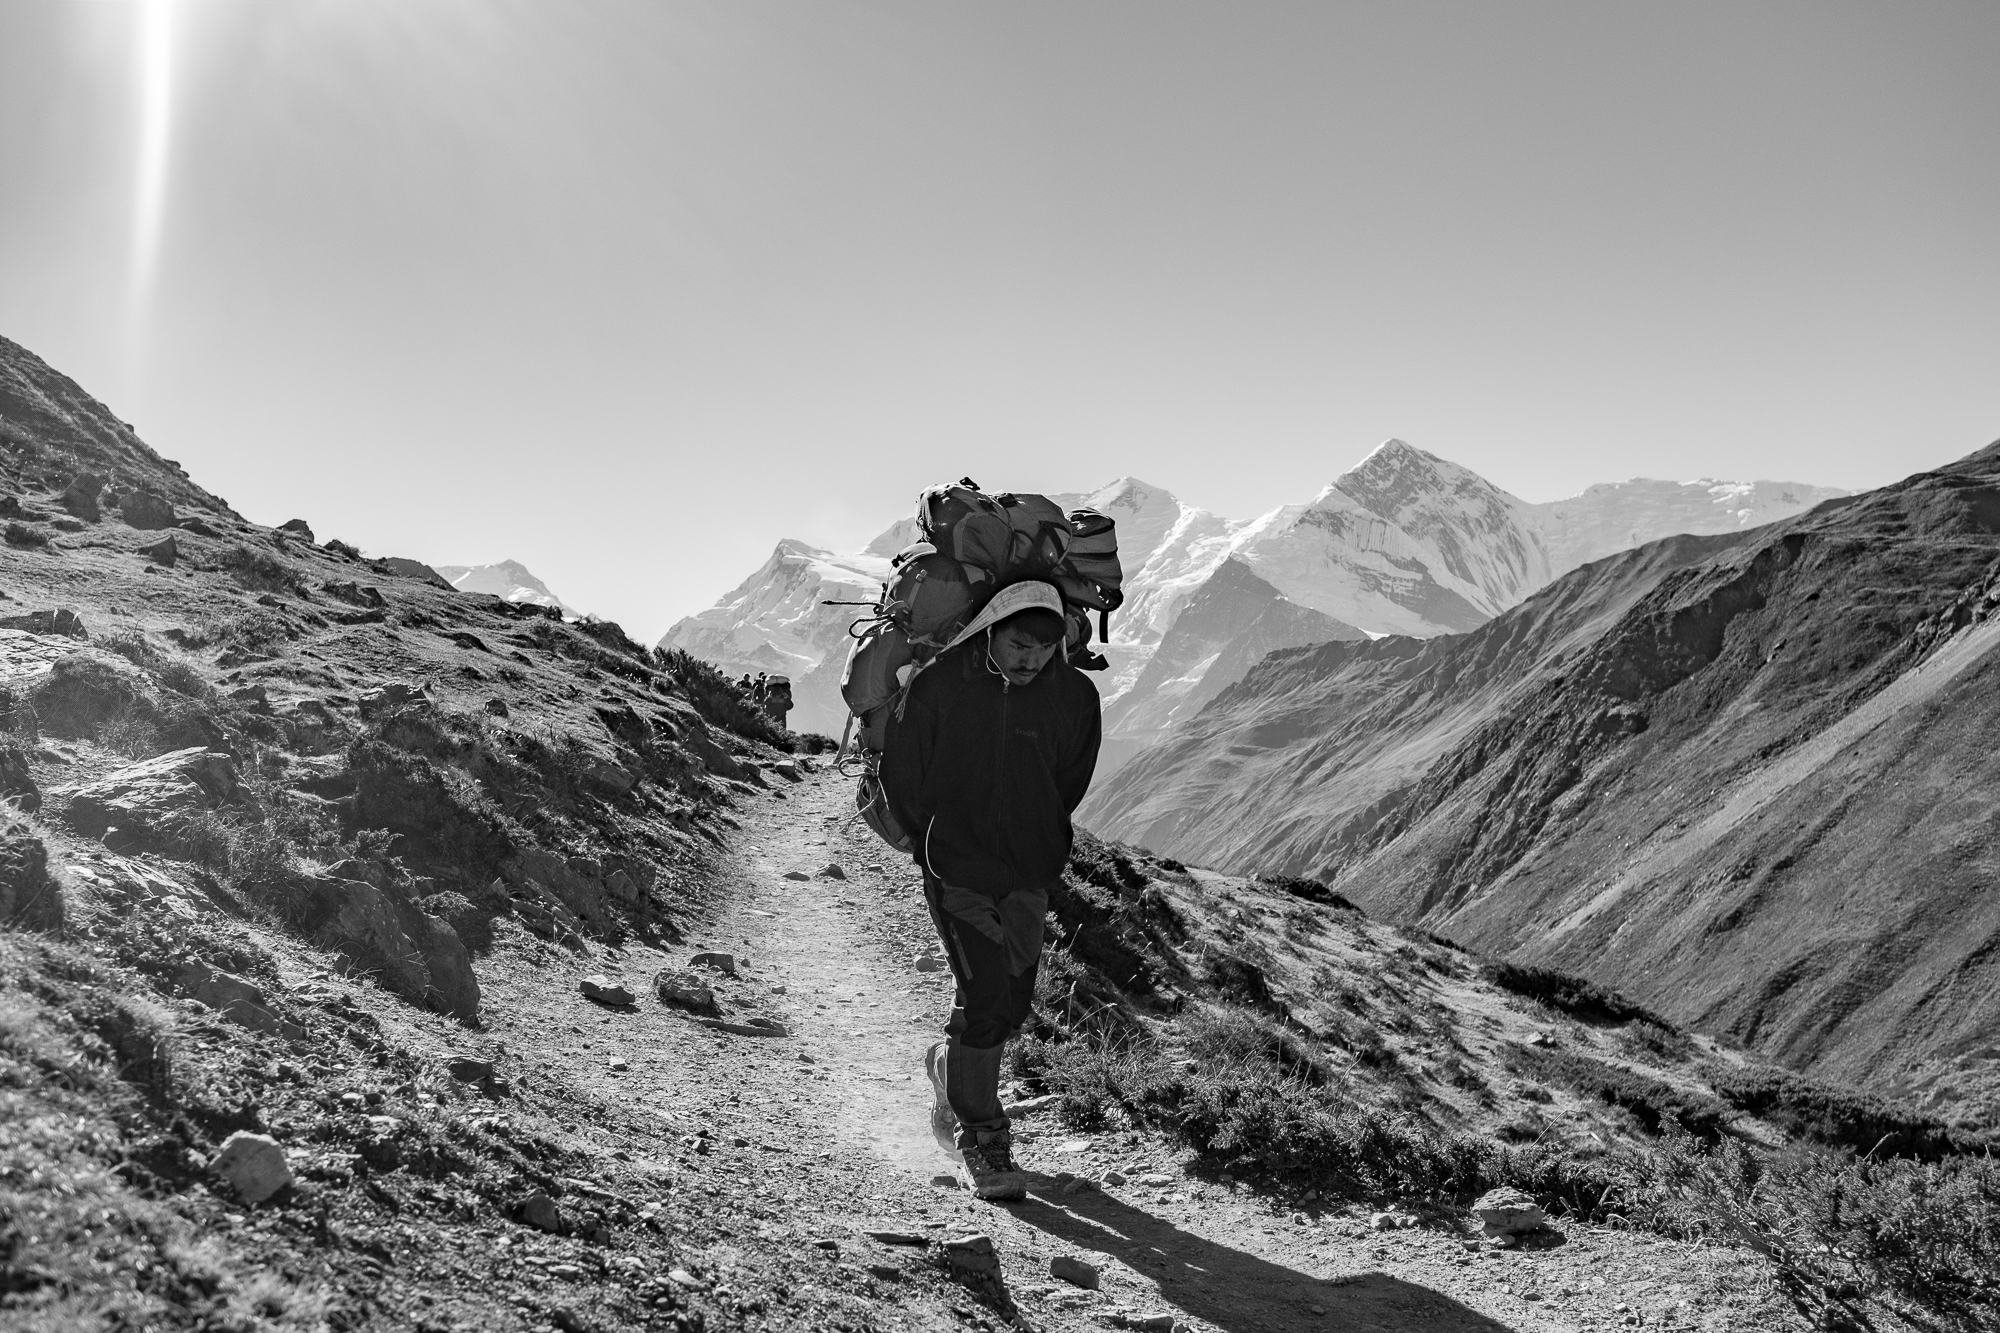
Porter carrying three full hiking backpacks, from Manang up to the lower basecamp. Even if they carry an incredibly heavy load, porters often walk ahead of the group the whole time, at a slow but steady pace.
The trek usually takes from 15 to 20 days depending on the route and pace, but faster hikers can likely do it in less than 10. Still, acclimation takes time and not every person will handle the altitude the same way, so you should leave your schedule some flexibility if you are planning a fast trip.
We decided to walk the usual anticlockwise (complete) route, starting from Besi Sahar and ending in Nayapul, with a total of 230-240 km and around +12,000/-12,000 meters of elevation. It took us a little more than 8 days, with still time to bathe at the natural hot springs of Tatopani, play card games, and enjoy the local apple brandy in Marpha (well, I did not finish the glass though).
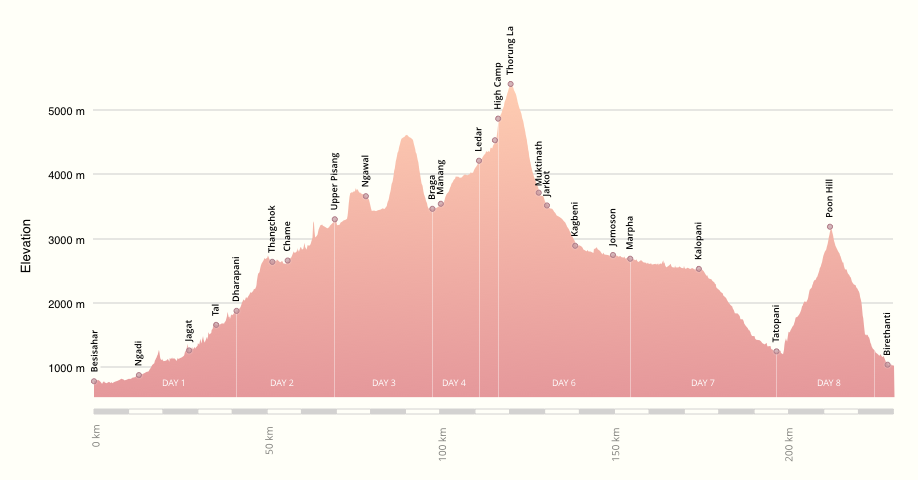
Elevation profile of the ACT from Besi Sahar to Nayapul, including side trips to Ice Lake and Poon Hill.
Day 1: Besi Sahar to Dharapani (41km, ▲1,950m / ▼870m)
From Besi Sahar, Jeeps climb all the way up to Manang, carrying gear or impatient tourists. The first kilometers can be walked but the hike on the dirt road is not pleasant and many choose to hitch a ride on a local bus or a jeep up to Khudi (+7 km) or Bhulbhule (+9 km).
We woke up around 6am and after a warm breakfast, had a bumpy hour-long ride to Bhulbhule. The bus was fighting with the road so much that milk started to pour from bags hooked to the ceiling. From there, we walked all day to Dharapani, passing by multiple villages on the way.
After 2pm, you will likely be asked if you need accommodation and a hot shower. In the winter, you can be the only traveler in a village of 12 hotels, so competition is rude. Once you reach a certain altitude, most of the rooms start to be free (400-600NRP at lower altitude) but meals get more and more expensive as food has to be grown locally or carried on a jeep or a horse.
Menu prices are fixed, but accommodation, wifi, electricity, and hot water can be bargained. In low season, they can all be free if you ask (except for hot water at higher altitude).
A little before Dharapani, we passed Tal, a small village along the Marsyangdi river, embedded between two valleys. A breathtaking view and definitely a beautiful place to spend the night.
We arrived in Dharapani around 5pm. The temperature drops quickly at night, and warm teas are a great way to wait for dinner before going to bed. Order a large pot! As for food, lodges usually have a very comprehensive menu, from local dishes to macaroni, sometimes 10 sorts of pizzas, or even pies. You can also enjoy the staple dal baht from breakfast to dinner, to your convenience. Dal baht is the only option in the menu that gets you free refill if you’re hungry. I can vouch for that. :)

Despite carrying heavy loads, I noticed porters always hike in front of their group and arrive earlier to their destination at the end of the day.
For lunch, we order extra for breakfast (chapati bread, eggs, hmm, vegetables wrap from Braga) and ask for it to be packed. If you’re not in a hurry, you can indeed stop for lunch at any lodge on the way. There are also a few outposts selling snacks at prohibited prices, but still cheap compared to western countries.
Day 2: Dharapani to Upper Pisang (30km, ▲1,950m / ▼780m)
The advantage of going to bed at 9pm, after a restless day, is that you wake up fresh and motivated at or before 6am the next day. If you want to leave early, opt for a quick breakfast but be warned that if you order for 6:30am, it will be served at 7 (and 7 at 7:30). Nepalese time they say. ;)
From Dhararapani, the trail splits in Dhukur Pokhari. You can either go to Lower Pisang (3210m) or Upper Pisang (3400m), and both trails meet again in Braga. The lower route is a little faster, but the higher is far better for acclimatization. Spending a night at Upper Pisang and walking up Ghyaru (3700m) and Ngawal (3570m) the next day will help you with the altitude.
In higher altitude, the lack of oxygen (hypoxia) can have strong and hazardous effects on the human body. The higher you go, the less oxygen is present in the air. At 3000m, you get 71% of sea level oxygen; at 5000m, 55%. Someone brutally arriving from sea level to 5000m will lose consciousness and die quickly.
The body reacts to oxygen depletion in two ways:
- an immediate reaction: increasing breathing and heart activity to capture more oxygen;
- a slower reaction: increasing the number of red cells in the blood for better oxygen transport. This takes around one week.
Taking the time to slowly acclimatize is key to have a positive experience at high altitude. After 3500m, the common rule is maximum 300-700m of elevation difference between each night (300m for very conservative rules, 600-700 for the most relaxed). That is, you can start at 4000 in the morning, go up to 5000 during the day, and come down to 4500 to sleep: 500m of elevation difference. It is recommended to go a little higher every day and come down to sleep. Spending at least one or two hours 100/200m higher during the day is a great way to sleep better and enjoy your following day, giving a little kick to your organism. If the trail doesn’t go up during the day, take one hour after arriving at your last point and climb these 100/200m before dinner. The longer you stay, the better. Listen to your body and how it reacts to high altitude.
Note: You can find more information on the CDC website and in this article on high-altitude medicine.
Day 3: Upper Pisang to Braga (30,5 km, ▲1920m / ▼1930m), incl. ice lake
Day 3 was clearly the hardest for me. We started the day around 7am from Upper Pisang, and hiked all the way to Braga, passing Ghyaru and Ngawal. The trail is quite steep and after 10am, it started to be really hot. We had left the forest and high vegetation areas –and we would not meet them again before Muktinath– and were greeted by small bushes and sparse trees.
Quoting Wikipedia:
It is recommended that trekkers take the high trail from Pisang via Ghyaru and Ngawal to Manang, as the views are spectacular and the two villages along the route are some of the best-preserved samples of Tibetan-style villages still in their original state. Sleeping in either of these villages assists with acclimatization, as they are located already higher than Manang.
We arrived in Braga a little before 1pm (I was quite disappointed, as every book had been telling us that the “Trekker Bakery” had delicious treats. But it was closed in off season). We left our bags at a small restaurant, and started the ascention to Ice Lake (4,610 m), thinking it would be a good acclimatatization side trip. Oh dear!
If you arrive from Upper Pisang and walk fast, you should have plenty of time in the afternoon, so you can go to Manang or stay in Braga and walk up to Ice Lake a little. But maybe not all the way up. There’s 1,200 m of elevation from Braga to the lake for only a few kilometers of trail, it’s steep. As we were trying to come down before sunset, we pushed hard to keep a good pace, and that’s not something you want to do when acclimatizing. Climbing too fast is just the best way to get sick. Also, hum, remember to bring enough water… I told Sara we could refill water at the lake. Yes, the Ice Lake. When we arrived, there was only muddy ice around the lake.
Note: If you’re looking for a more aggressive acclimatization, you might have heard of Diamox (trade name for Acetazolamide). It is designed to help your body make the chemical changes needed to function better at altitude. It’s not a wonder drug, it’s a prescriptiong drug so you should not attempt to self-medicate without knowing the risks. For the majority of treks, it’s not necessary. However, taking daily doses of Diamox starting the week or days before the high altitude areas can increase your ventilatory response and lessen the risk of altitude sickness. And also making your sleep better.
Speaking of sleep, never take sleeping pills in altitude! Avoid alcohol and most sleeping agents since they both suppress breathing and result in lower blood oxygen).
Day 4: Braga to Yak Kharka (12 km, ▲720m / ▼70m)
After Braga and Manang, you don’t have a lot of choices if you’re not already acclimatized before the trek. The last three villages with lodges are Ledar, Lower Basecamp, and Upper Basecamp. Going over the pass from Ledar is achievable, but it’s a long day, and you still have to go down a lot afterwards. With the steep altitude change, it is recommended to spend one full night at Lower or Upper Basecamp before the pass. Otherwise, you might have to go back down in the valley in a terrible shape, or worse.
Still, for those who hike the clockwise trek, the last village before the pass is at 4100 m. They have to ascend 1300 m during the day, and descend 600 m afterwards. Such altitude change is feasible, but not recommended considering safety and rapid changes of weather condition that can arise at the pass.
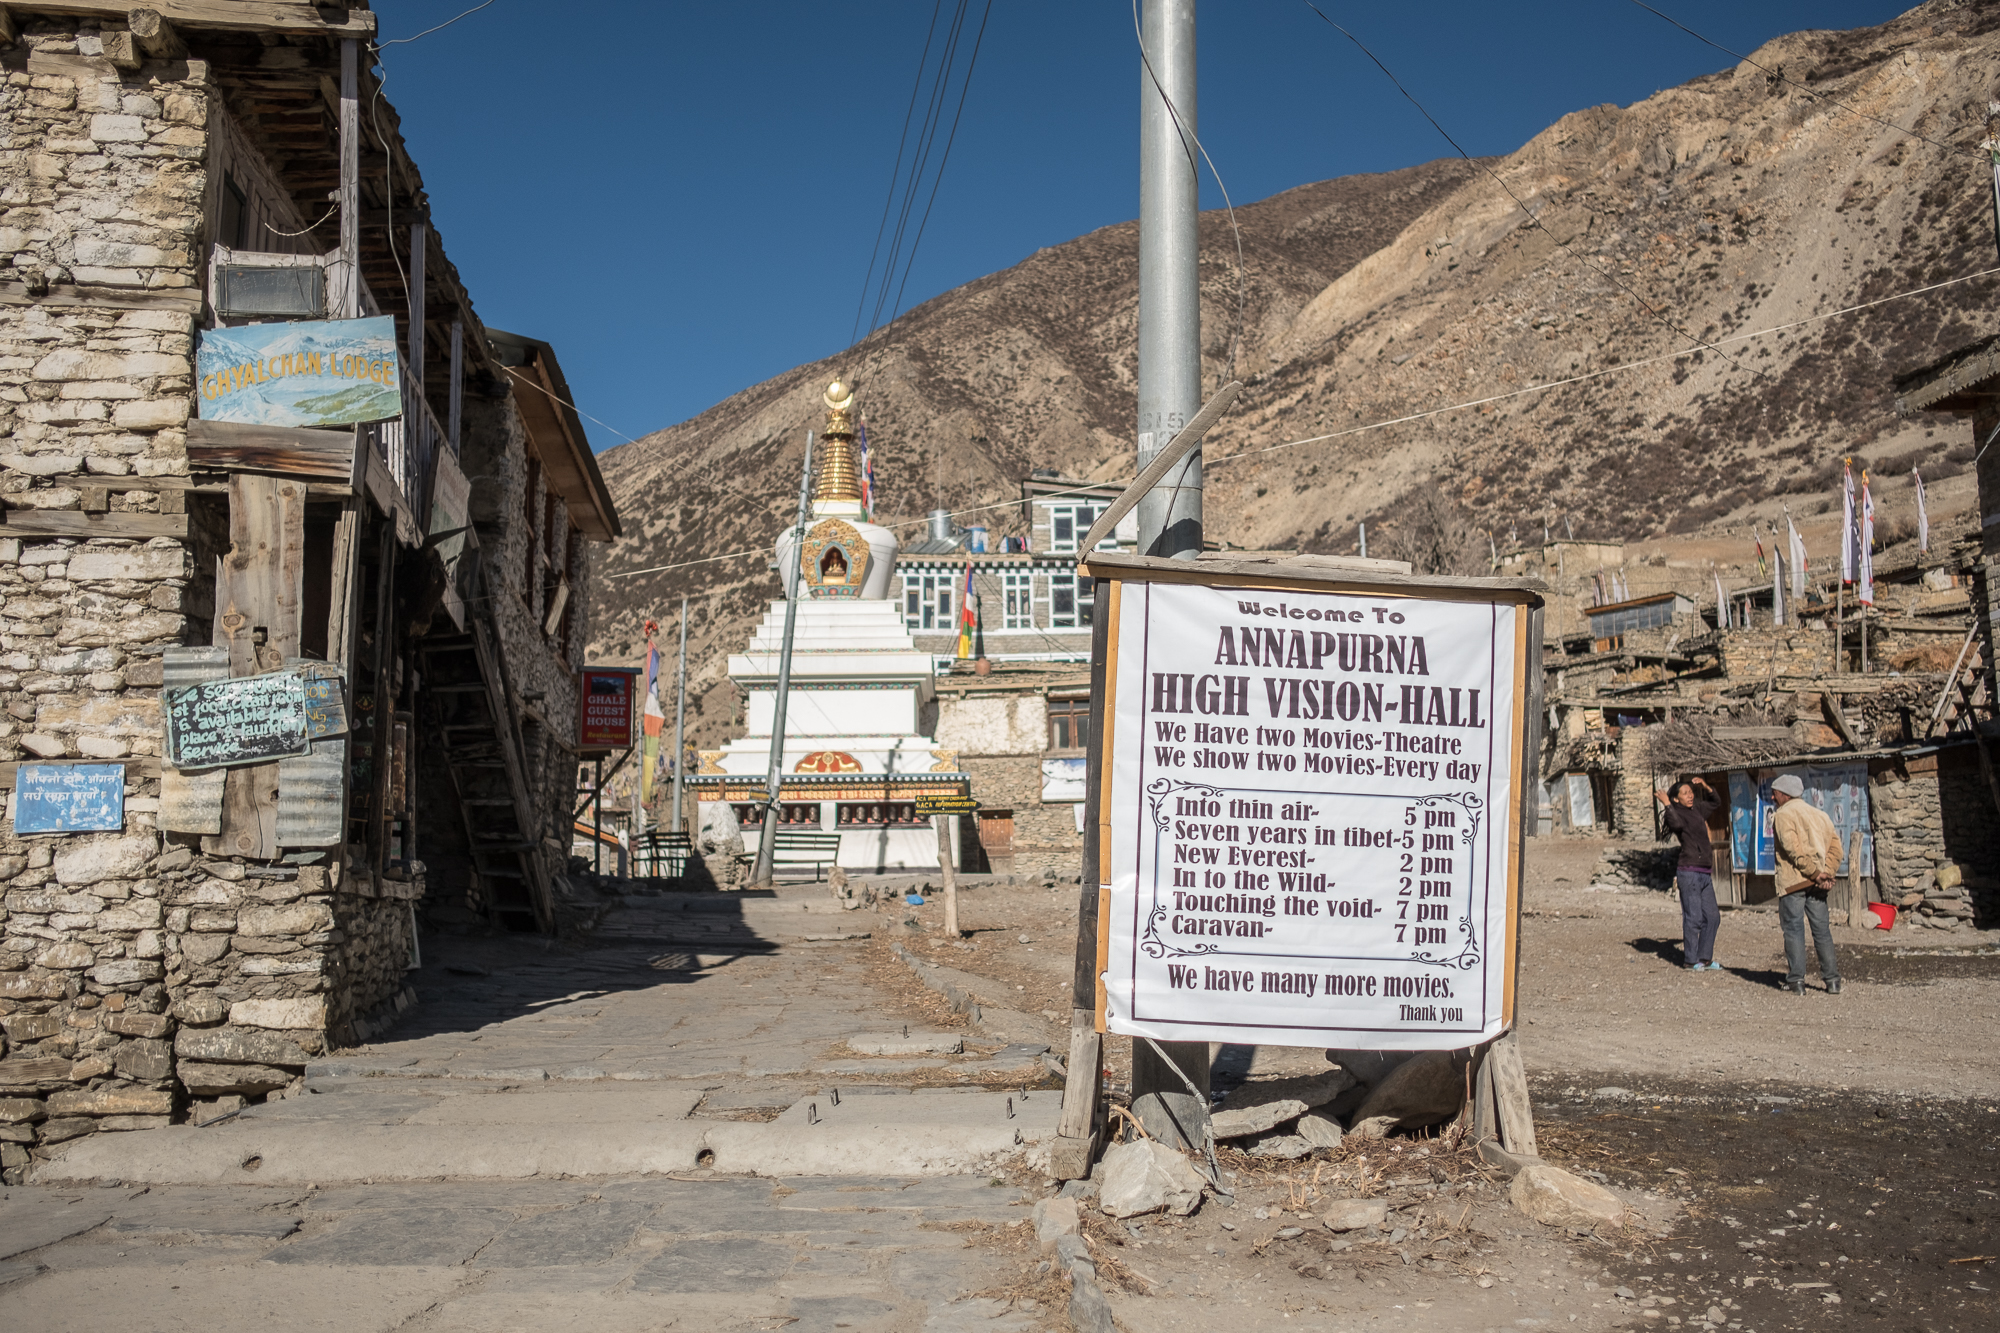
In Manang, the movie theater plays ‘Into the Wild’ every day at 2pm.
Days 4 (9km) and 5 (11km) were shorter than the other ones we hiked, but with the altitude change, every small walk is an adventure. Your body feels heavier, you walk slowly, and if you try to run, your head buzzes and pulses. Depending on your condition, you might experience difficulties to breathe or splitting headaches, which is the sign that your body is not acclimatized to the altitude. Forcing the pace is clearly a dangerous move. Take your time, and go back and down if you’re not feeling well.
Day 5: Yak Kharka to High Camp (11km, ▲1,070m / ▼310m)
Now is the time to celebrate! Why? Because the lower basecamp has a year-round open bakery. There seem to be a tradition of German Bakeries in Nepalese trekking areas, likely due to German tourists. In low season, you see “German bakery” signs everywhere, and they’re all closed. But not at the lower basecamp! Yay for cinnamon rolls. You deserve them, take one or more.
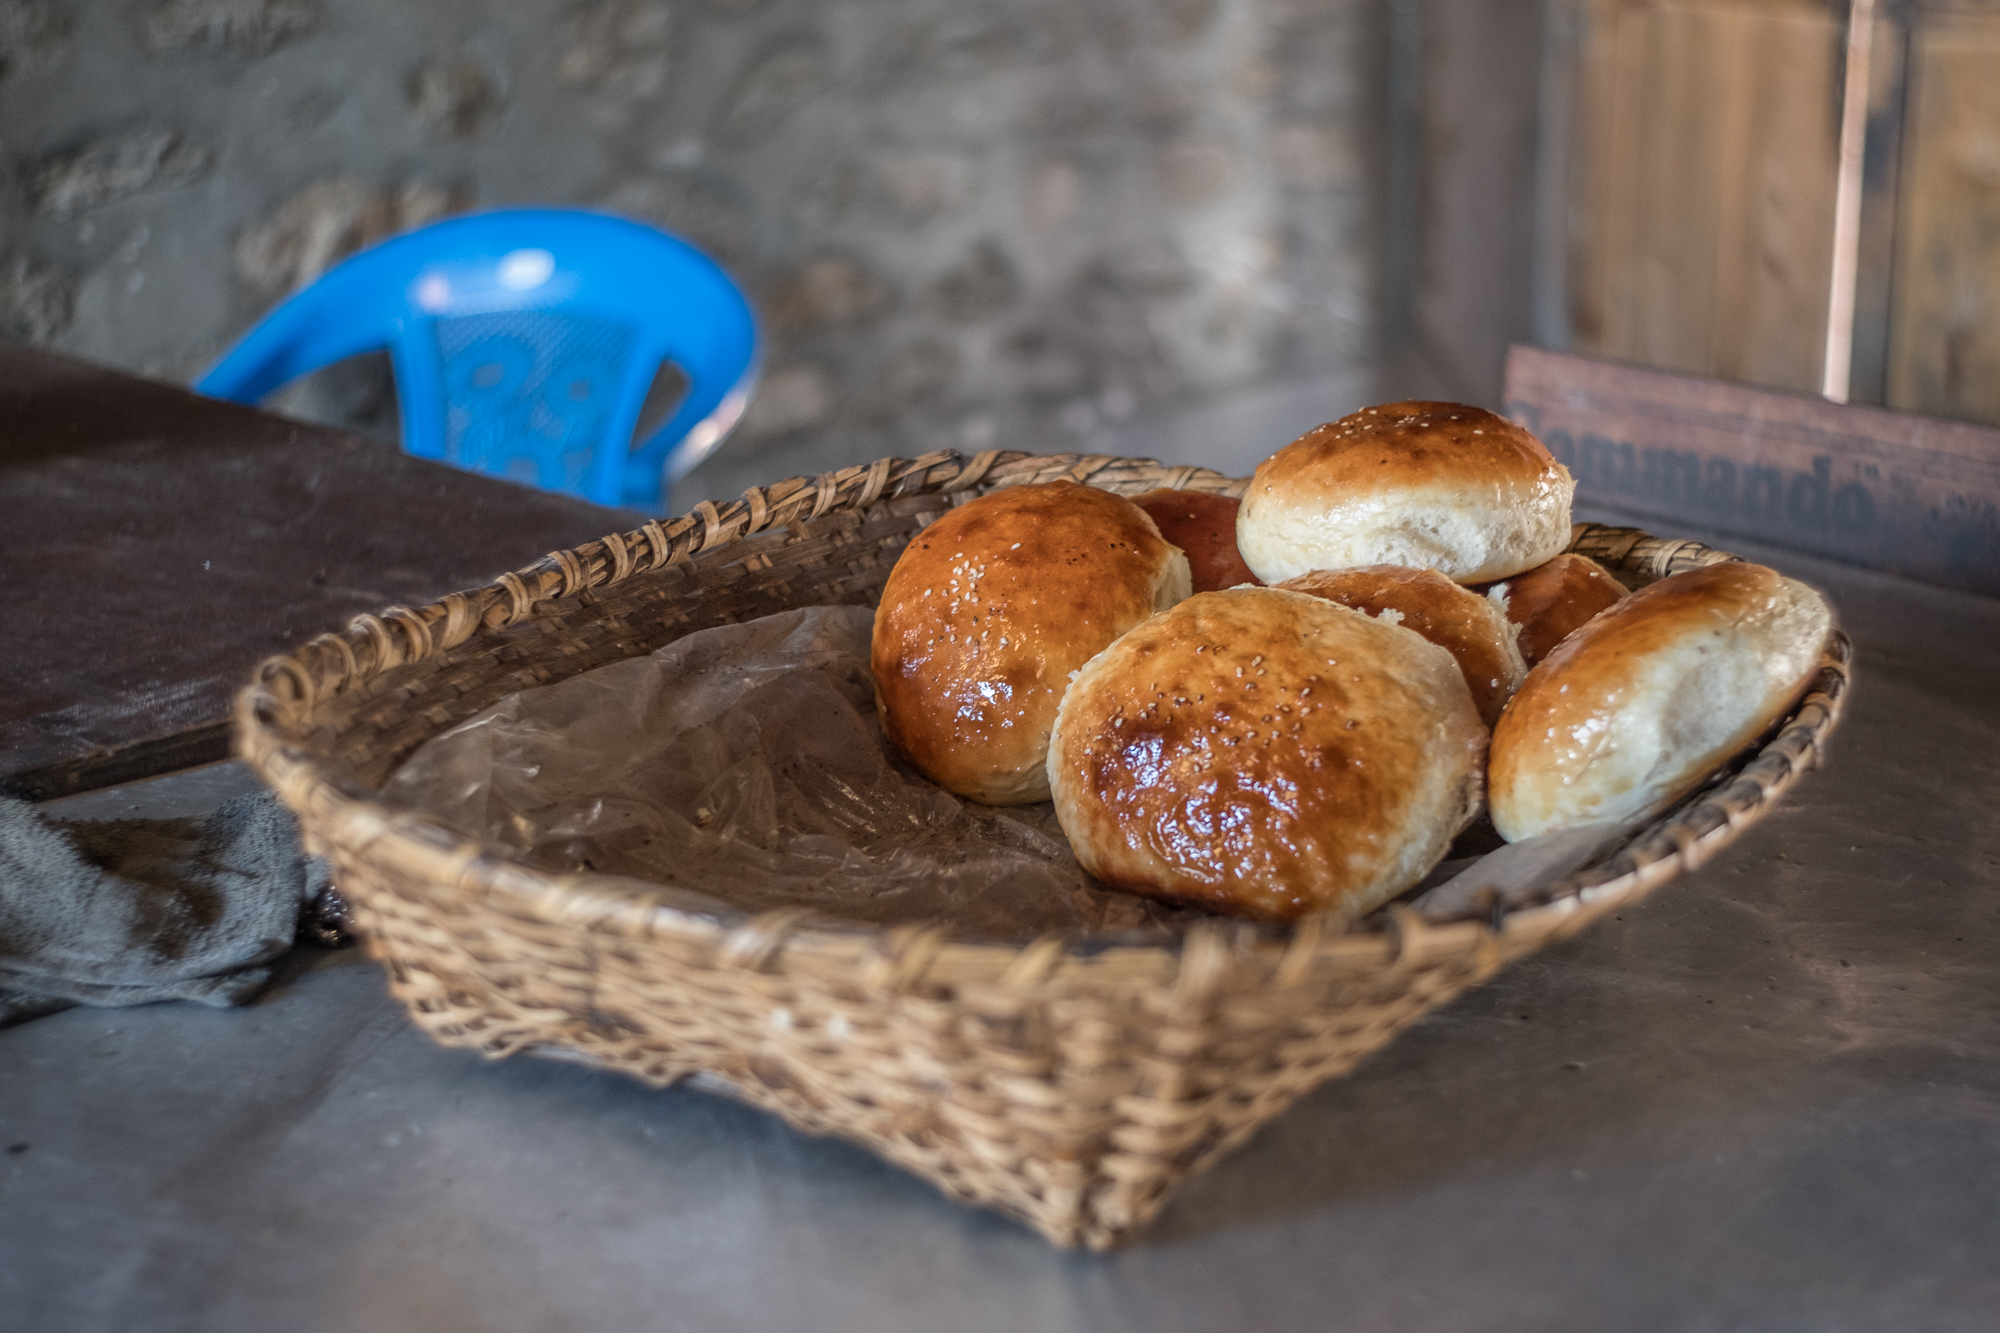
Fresh sweet buns at Thorung Phedi. The bakery sells sweet rolls and cinnamon rolls for 300NRP each. Utterly expensive compared to prices down in the cities, but don’t you deserve one?
Now, we head towards Thorong Pedi High Camp! The trail is a short but steep rocky slide. Remember, once you arrive at the basecamp, go climb a little for acclimatization.
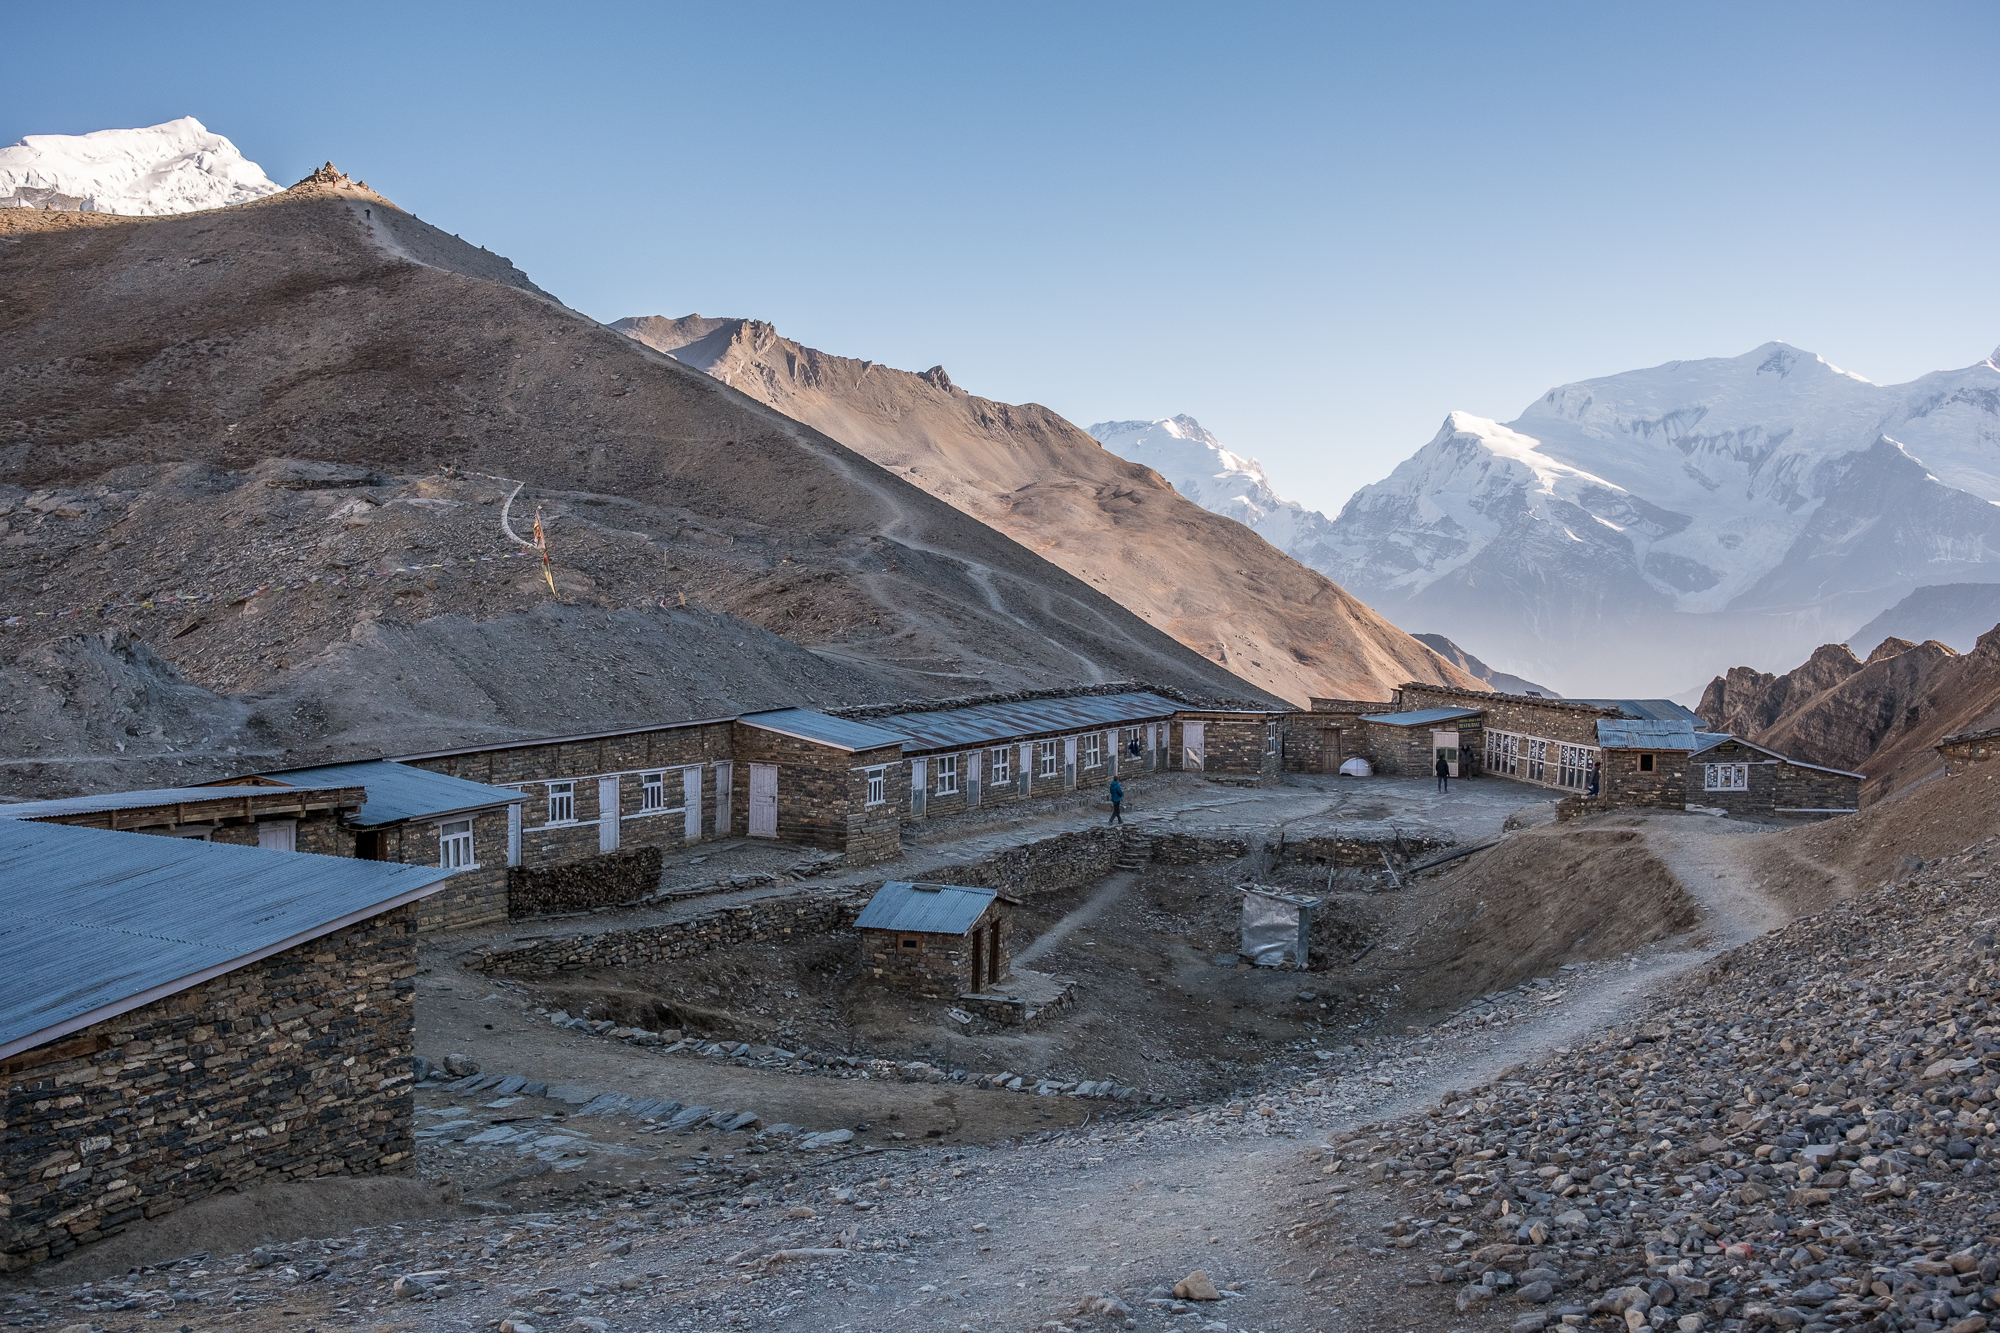
Thorung Pedi High Camp, with a view on shared rooms (with two beds) and restrooms. The last building is the main area with the kitchen. Don’t forget your down jacket(s), even inside.
I forgot to mention one drawback about high altitude: the nights. You might experience difficulties to sleep and from what I’ve heard, many didn’t sleep at the basecamp. Many also see stars flashing as they close their eyes, produced by electrical stimulation; a phenomenon called phosphene that occurs more at high altitude. But no need to close your eyes. At night, the clear skies of the Annapurnas will reveal the marvel of hundreds and hundreds of stars.
Day 6 (Merry Christmas): High Camp to Marpha (43km, ▲900m / ▼3090m)
It’s 5am and you’re already awake. Merry Xmas, it’s December 24th. Like everyone, you went to bed before 8pm to get ready for the last ascension. Good for you, you can get breakfast at 4am here. Go in the main room and have a tea. Scavenger the plate full of pancakes that the German family left behind when they left in a hurry. Life is good.
The thermometer indicates -20°C, so layer up, take you backpack, and jump outside.
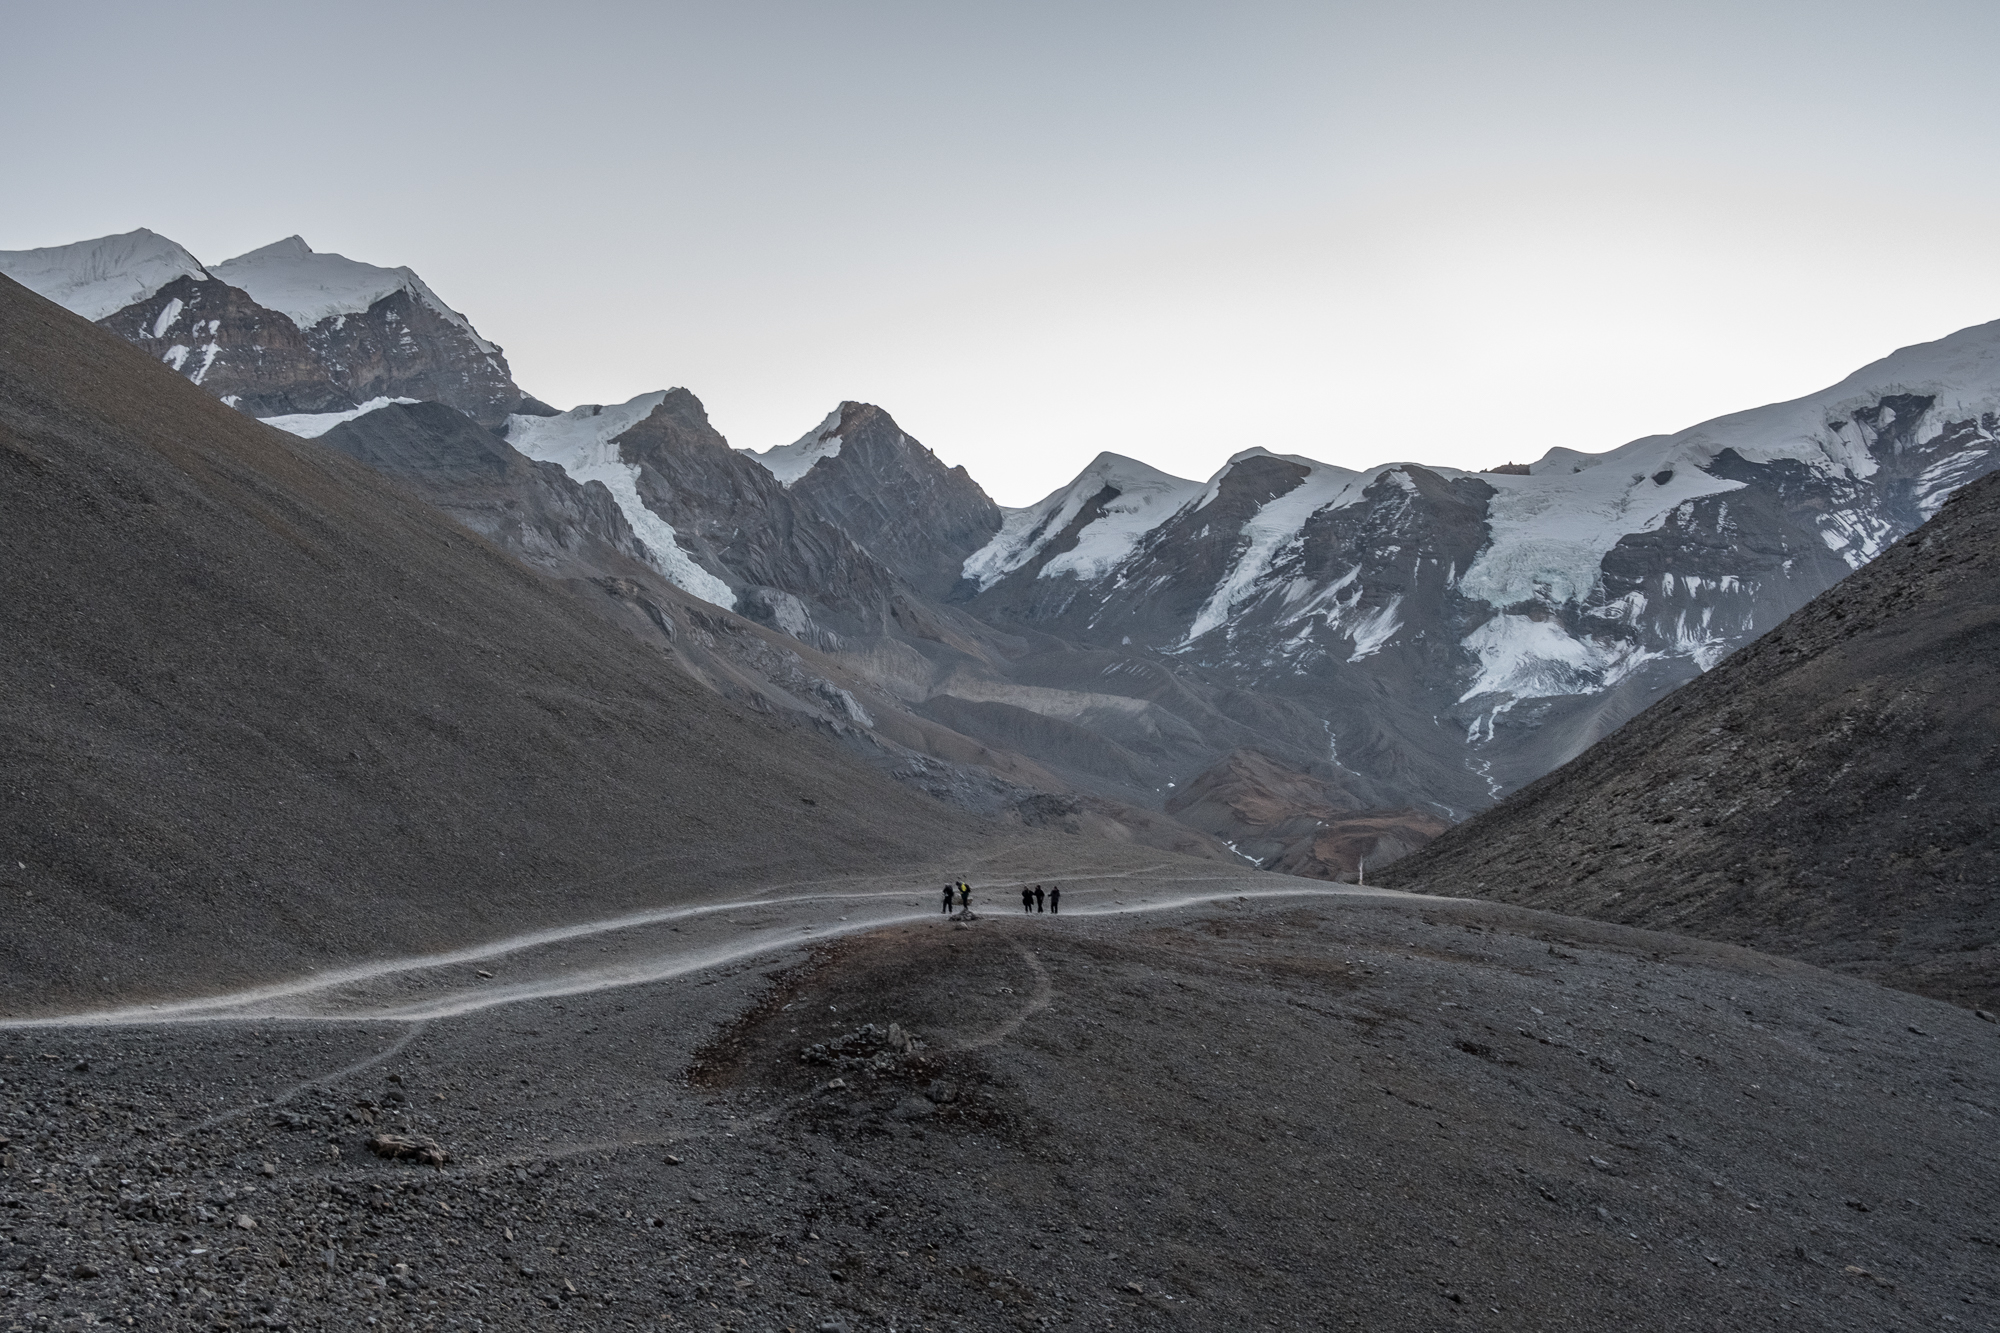
Hiking before sunrise, on the way to the pass. For a late December trip, the weather was surprisingly pleasant. We carried microspikes the whole time, but never had to use them.
While many choose to start early, you can wake up at 9 or 10am at the High Camp to go over the pass. It took us a little less than 2 hours, and then it’s only down to Muktinah after that. However, weather conditions can be unpredictable. In the morning, you have fewer chances of experiencing strong winds. If there is snow, avalanches.
Still, every year few scared hikers start at 3am, unprepared, and end up with frostbites everywhere. Nights are chilly, so start around or just before sunrise and layer up.
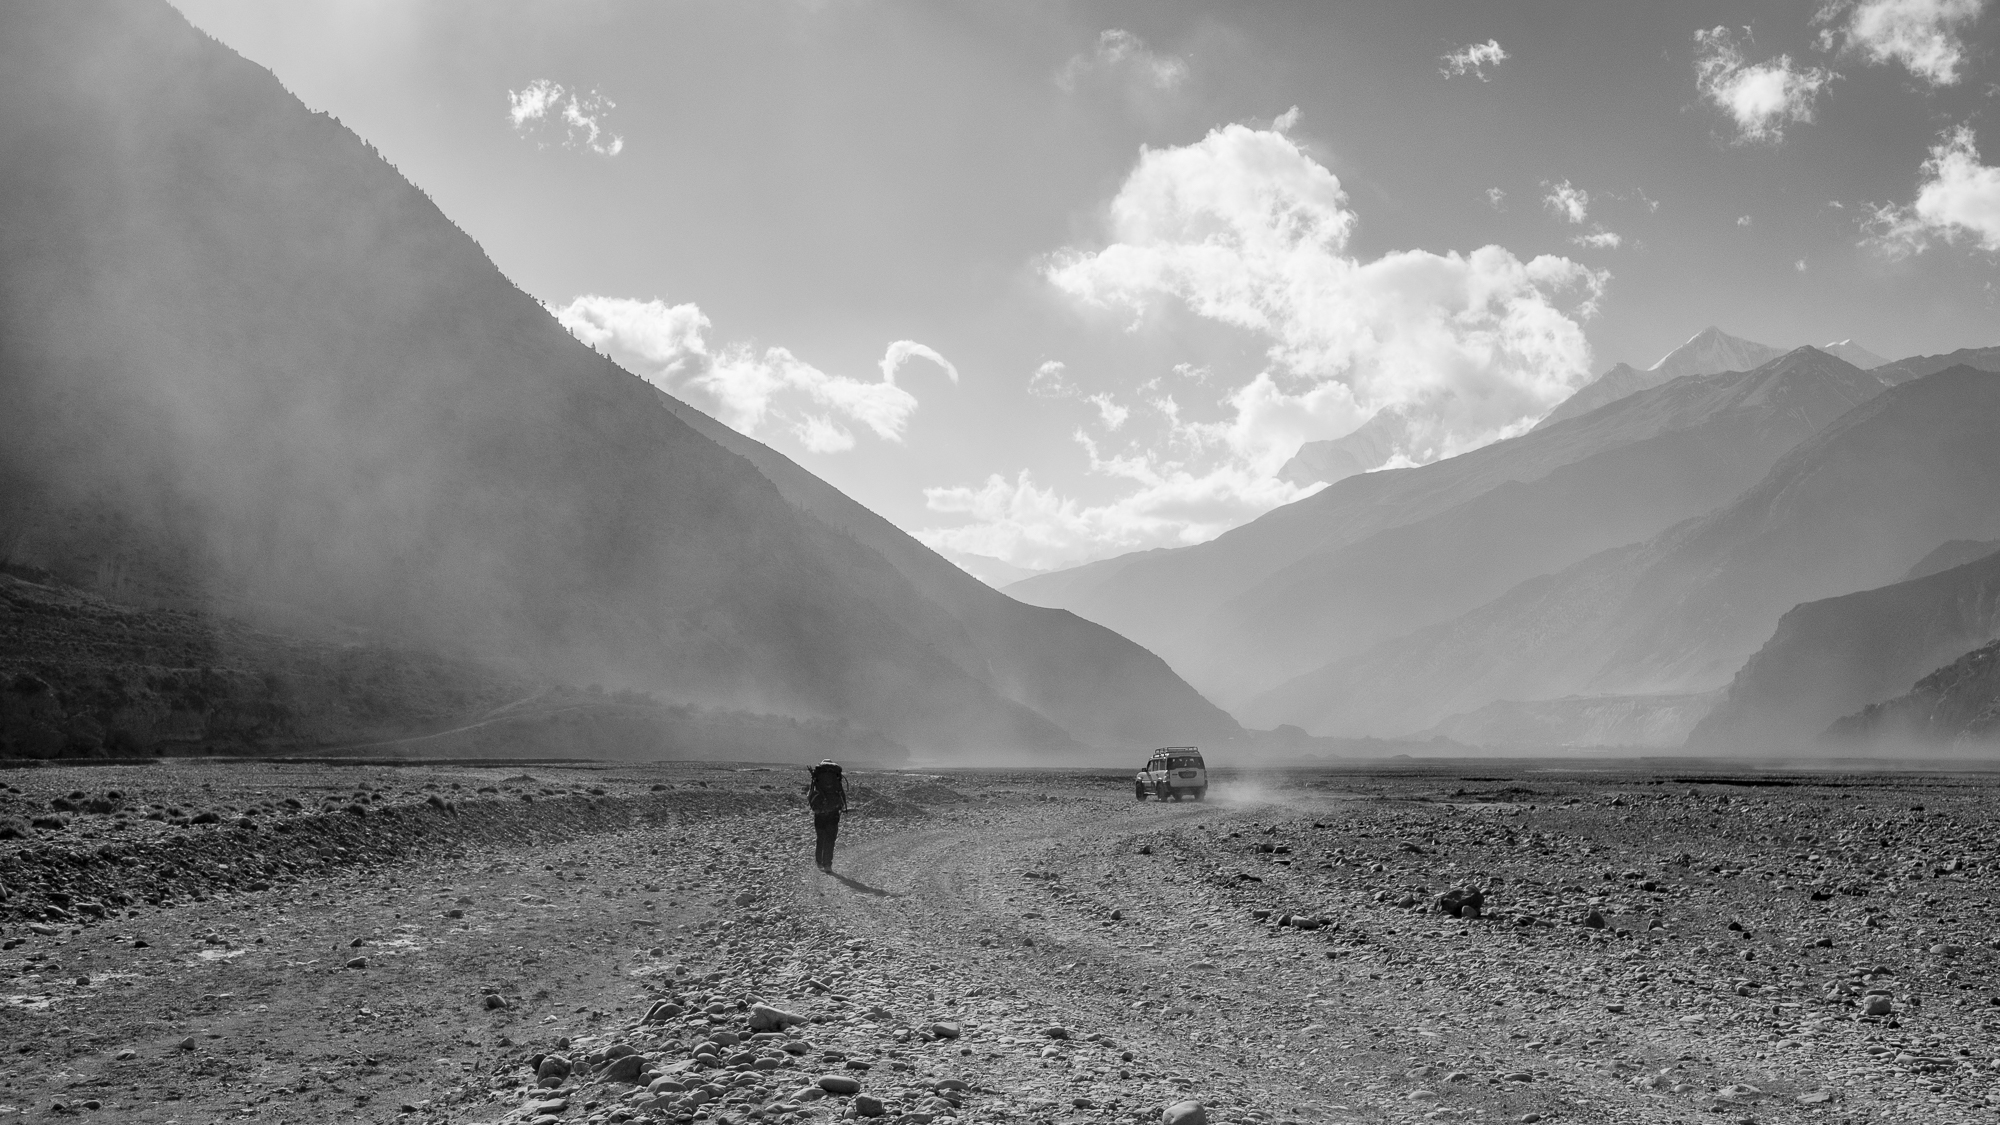
We experienced strong wind blowing sand all across the riverbed from Kagbeni to Jomsom. Bring a scarf or buff to protect yourself.
This is an usual weather in the Kali Gandaki River gorge: heat from the sun in the Mustang District causes strong southerly winds that carry sand and small stones. The Jomsom airport is known for its difficult weather and many flights are delayed.
Day 7: Marpha to Tatopani (42km, ▲1200m / ▼2430m)
I unfortunately didn’t take many notes of the last three days and my memory is not as sharp anymore. These last days were less strenious, except the final bit up to Ghorepani (Day 8). The environment and climate is completely different from the high altitude areas, with luxurious vegetation and water flowing around.
From Marpha to Kalopani, the walk goes up and down (▲1024m / ▼1135m). From Kalopani, you can rest, it’s mostly downhill. Upon arriving in Tatopani, make sure to go to the natural hot baths, a proper treat after a long day of walking.
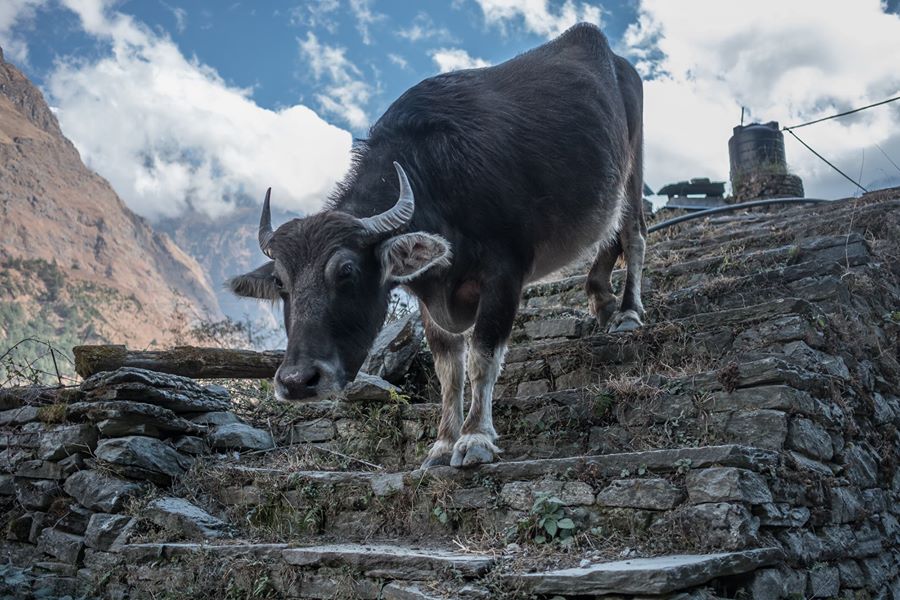
New cute friend on the trail.
Day 8: Tatopani to Tikhedhunga (25km, ▲2100m / ▼1900m)
This was a hard day for me given the elevation and the fatigue of the previous days. My knees were starting to hurt when I arrived in Tikhedhunga. This is also the most touristic part of the Annapurna Circuit, rejoining the short Poon Hill loop. This day could be made a bit shorter by not stopping for the landscape on top of Poon Hill, but why not go and enjoy the view?
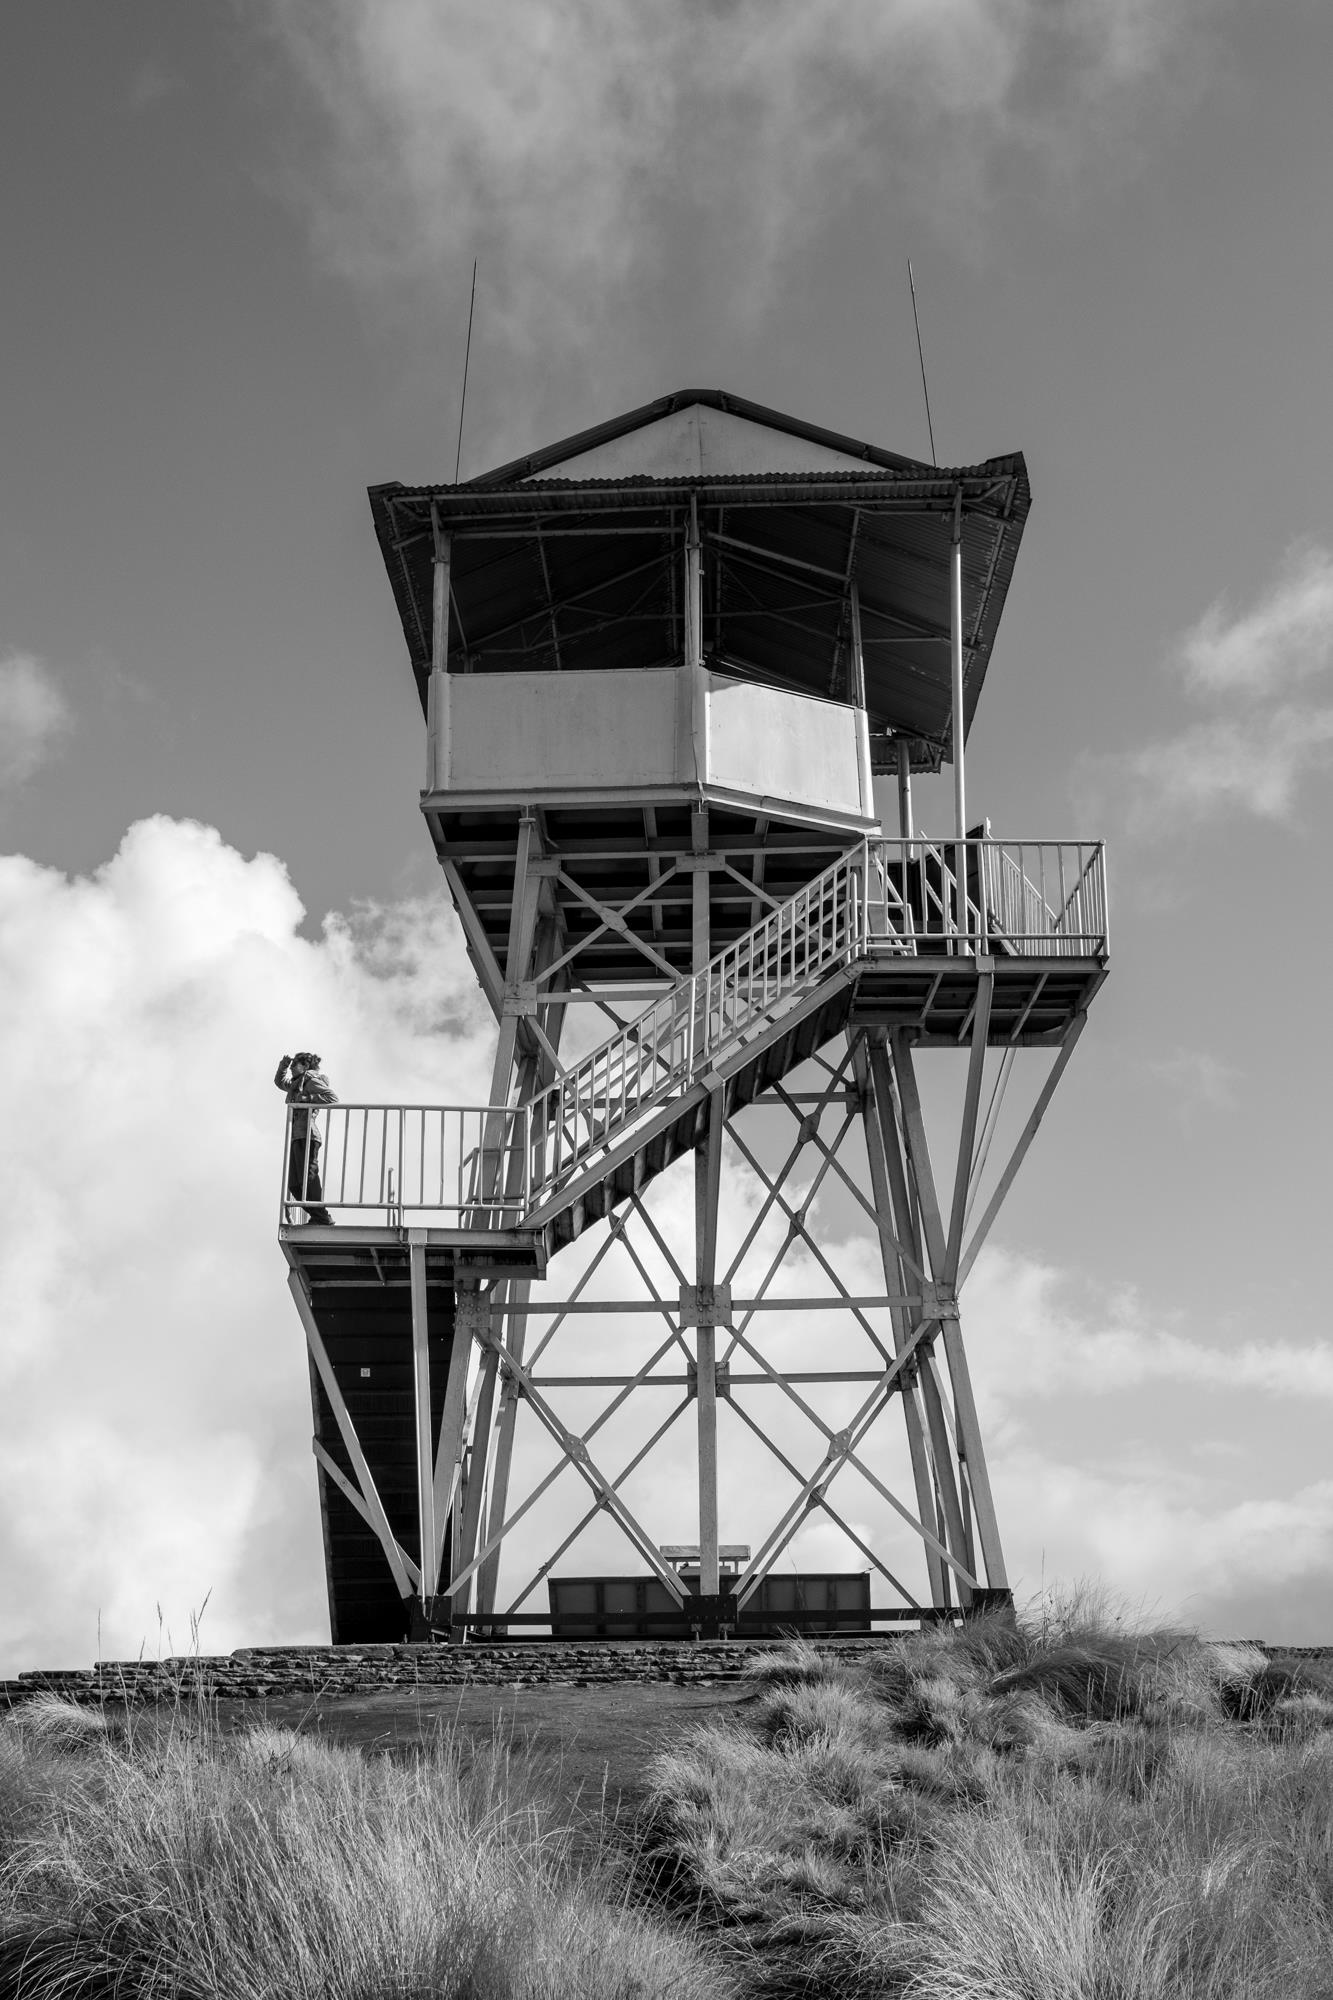
The Poon Hill offers a clear view on the Annapurnas, except when you arrive mid day and the sky is full of clouds. :(
Day 9: back to Pokhara! (8km, ▲400m / ▼880m)
A short morning walk to Nayapul and bus back to Pokhara today. You can catch any bus from Birethanti or if you’re in a hurry, share a small taxi. For two or three people, the price is a little bit higher but not by much.
What to bring to walk the Annarpurna Circuit in winter
Compared to a multi-day hike without assistance, not much. You will find food, lodges, and water along the way. Make sure you are equiped to treat the water (water purification tablets work well, don’t weight much, and won’t fail you), and have the necessary medkit for high altitude (ibuprofen, prednisone, yada yada, talk to your doctor).
During the winter, the temperatures can drop quickly and the weather may be inclement with heavy snow and wind. Bring windbreaking clothes, merino layers, and microspikes for snow or ice. GoreTex shoes or boots will help warm your feet. A good sleeping bag confortable to -10/15°C at least (my -10°C homemade sleeping quilt was reasonbly warm while wearing two layers at the basecamp). You’ll suprisingly find AC outlets even high up in the Annapurna if you need to charge electronic devices, although phones and GPS navigation are not particularly necessary given how well marked the trail is.